So, you’ve finally received your NDIS plan. You open the email or the letter, and there it is—a document that holds the key to the support you’ve been waiting for.
But instead of feeling relieved, you might feel something else entirely.
“What do I do now?”
“Who do I call first?”
“What if I make a mistake?”
If this sounds familiar, please know that you are not alone. Thousands of Australians feel exactly the same way when they first start their NDIS journey. The scheme is life-changing, but it can also feel like stepping into a foreign country where you don’t speak the language.
The good news? You don’t need to know everything today. You just need to know the first steps.
This guide is designed specifically for new NDIS participants. We will walk you through practical tips, answer the questions you’re probably too nervous to ask, and help you build the confidence to take control of your plan.
Let’s start this journey together.

Contents
- 1 What Does It Mean to Be an NDIS Participant?
- 2 Tip #1: Take a Breath and Read Your Plan Slowly
- 3 Tip #2: Understand the Three Funding Buckets
- 4 Tip #3: Choose How Your Funding Is Managed
- 5 Tip #4: Find a Support Coordinator (If You Have Funding)
- 6 Tip #5: Take Your Time Choosing Providers
- 7 Tip #6: Always Use a Service Agreement
- 8 Tip #7: Keep Track of Your Spending
- 9 Tip #8: Don’t Be Afraid to Ask Questions
- 10 Tip #9: Prepare for Your Plan Review
- 11 Tip #10: Be Kind to Yourself
- 12 Quick Reference: 10 Tips for New NDIS Participants
- 13 What to Do in Your First Week
- 14 Conclusion: Your Journey Is Just Beginning
- 15 Learn More About NDIS
What Does It Mean to Be an NDIS Participant?
Before we dive into the tips, let’s start with the basics.
Being an NDIS participant simply means you are someone who has been approved for funding under the National Disability Insurance Scheme. You have a plan that outlines:
- Your personal goals (what you want to achieve)
- The supports you are funded for (the help you can receive)
- How your funding is managed
Think of yourself as the captain of your own ship. The NDIS provides the resources (the fuel and the map), but you are in charge of where you go and how you get there. That can feel like a lot of responsibility at first, but with the right tips, you will feel like a confident captain in no time.
Tip #1: Take a Breath and Read Your Plan Slowly
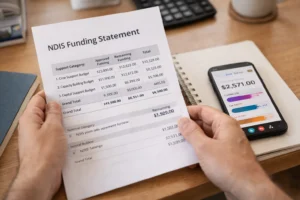
When you first receive your plan, it’s tempting to skim through it quickly or put it in a drawer because it feels overwhelming. But your plan is your most important document.
What to Look For:
- Your Total Funding: How much money is in your plan? (But remember, this is split into categories!)
- Your Support Categories: Look for the three main buckets—Core, Capacity Building, and Capital. (We’ll explain these shortly.)
- Your Plan Dates: When does your plan start? When does it end? Mark the end date on your calendar.
- Your Goals: These are the things the NDIS is helping you work towards. Keep them in mind when choosing supports.
Pro Tip:
Read your plan with a family member, friend, or advocate if you can. Sometimes having another set of eyes helps you catch details you might miss.
Tip #2: Understand the Three Funding Buckets
This is one of the most important tips for new NDIS participants. Your total funding is divided into three categories, and you cannot move money between them without asking for a plan review.
| Category | What It Covers | Examples |
|---|---|---|
| Core Supports | Your everyday, ongoing needs | Help with showering, cleaning, gardening, transport, continence products, meals |
| Capacity Building | Supports to help you build skills and independence | Occupational therapy, physiotherapy, psychology, employment support, support coordination |
| Capital Supports | One-off, higher-cost items | Wheelchairs, vehicle modifications, assistive technology, home modifications |
Why This Matters:
Imagine you have $10,000 in Core and $5,000 in Capacity Building. If you spend all your core funding on transport, you might have nothing left for daily personal care. And you cannot take money from capacity building to cover core supports unless you request a change.
Real-Life Example:
Emma received her first plan and saw a total of $30,000. She thought she could use it all for therapy sessions. Six months later, she realised she had spent her capacity-building budget (where therapy sits) but still had core funding left. However, she couldn’t use Core funding to pay for more therapy. She had to wait until her plan review to adjust her budgets.
How to Avoid This: Ask your support coordinator or plan manager to explain your budget breakdown. They can help you track what you’re spending in each category.
Tip #3: Choose How Your Funding Is Managed
When you receive your plan, you will see how your funding is managed. You have three options, and you can change this at your plan review if you choose the wrong one.
The Three Management Types:
1. NDIA-Managed (Agency-Managed)
- The NDIS pays your providers directly.
- You can only use registered NDIS providers.
- You don’t have to handle any invoices or paperwork.
2. Plan-Managed
- A plan manager pays your invoices for you.
- You can use both registered and unregistered providers.
- You don’t have to deal with the NDIS portal, but you still have flexibility.
3. Self-Managed
- You pay your providers and claim the money back from the NDIS.
- You have the most flexibility—you can hire anyone (even family members in some cases).
- You are responsible for all record-keeping and claiming.
Which One Is Right for You?
| Choose This If… | Management Type |
|---|---|
| You want the least amount of admin work and are happy using registered providers | NDIA-Managed |
| You want flexibility to choose any provider but don’t want to do the paperwork yourself | Plan-Managed |
| You want full control, are comfortable with admin tasks, and want to hire unregistered providers | Self-Managed |
Pro Tip:
Many new participants start with Plan-Managed because it offers the best balance of flexibility and ease. You can always switch later.
Tip #4: Find a Support Coordinator (If You Have Funding)
If you have funding for support coordination in your capacity-building budget, use it. A support coordinator is like a guide who helps you navigate the NDIS.
What a Support Coordinator Can Do for You:
- Explain your plan in simple terms
- Help you find and connect with providers
- Assist you with service agreements
- Help you prepare for your plan review
- Solve problems when things go wrong
Real-Life Example:
Michael received his first plan and had no idea where to start. He had funding for support coordination. His Support Coordinator, Sarah, sat with him for two hours, explained his budgets, introduced him to two local support workers, and helped him set up his service agreements. Within a week, Michael had support in place.
If you don’t have Support Coordination funding: You can ask your Local Area Coordinator (LAC) or call the NDIS for help. You can also request Support Coordination at your next plan review if you feel you need it.

Tip #5: Take Your Time Choosing Providers
You do not have to choose your providers on day one. In fact, rushing can lead to choosing someone who isn’t the right fit.
How to Find Good Providers:
- Ask for recommendations: Talk to other NDIS participants, local disability organisations, or your support coordinator.
- Interview them: You can meet a support worker for a coffee or a short trial shift to see if you click.
- Ask questions:
- “Are you a registered provider?”
- “What experience do you have with my type of disability?”
- “What happens if you’re sick and can’t come?”
- “Can you provide a service agreement?”
Red Flags to Watch For:
- They don’t want to provide a written service agreement.
- They pressure you to sign up immediately.
- They don’t have insurance or NDIS worker screening checks.
- They don’t listen to your questions.
Pro Tip:
It’s okay to try a few different providers before deciding who you want to work with long-term. You are in control.
Tip #6: Always Use a Service Agreement
A Service Agreement is a simple document that outlines what support you will receive, when you will receive it, and how much it costs.
Why This Matters:
Without a service agreement, you might:
- Be charged more than you expected
- Have confusion about who is responsible for what
- Struggle to resolve disputes if something goes wrong
What a Service Agreement Should Include:
- Your name and the provider’s name
- The type of support being provided
- The cost per hour or per session
- When and how you will be invoiced
- Cancellation policy (what happens if you cancel late)
- How to give feedback or make a complaint
Pro Tip:
Even a simple one-page email is better than nothing. Keep copies of all service agreements in a folder or on your computer.
Tip #7: Keep Track of Your Spending
One of the biggest worries for new participants is running out of funding before the plan ends. The best way to avoid this is to track your spending.
How to Track:
- If you are plan-managed: Your plan manager will usually give you regular statements showing how much you’ve spent in each category.
- If you are NDIA-managed: You can log into the NDIS portal or ask your LAC for help checking your balances.
- If you are self-managed: Keep a simple spreadsheet or notebook. Record every invoice you pay and every claim you make.
Simple Tracking Example:
| Date | Provider | Support Type | Budget Category | Amount |
|---|---|---|---|---|
| 01/03/2026 | Care Assist | Personal Care | Core | $60 |
| 05/03/2026 | Therapy Works | Occupational Therapy | Capacity Building | $200 |
Pro Tip:
Check your balances every month. If you notice you’re spending faster than expected, you can adjust before it’s too late.
Tip #8: Don’t Be Afraid to Ask Questions
The NDIS is complicated. No one expects you to understand everything straight away. Asking questions is not a sign of weakness—it’s a sign that you are taking control.
Who Can You Ask?
- Your Local Area Coordinator (LAC): They are there to help you understand and implement your plan.
- Your Support Coordinator: If you have one, they are your go-to person for questions.
- Your Plan Manager: They can explain your budget and invoices.
- NDIS National Call Centre: Call 1800 800 110 for general questions.
Real-Life Example:
Priya was confused about whether she could use her funding to buy a new mattress. Instead of guessing, she called her LAC. The LAC explained that a specialist mattress might fall under assistive technology, but she needed an assessment from an occupational therapist first. Priya got the assessment, submitted the report, and was able to purchase the mattress she needed.
If Priya hadn’t asked, she might have bought the mattress herself and been unable to claim it back.

Tip #9: Prepare for Your Plan Review
Your NDIS plan usually lasts for 12 months. Towards the end of that period, you will have a plan review—a meeting to discuss what worked, what didn’t, and what your next plan should look like.
How to Prepare:
- Start 3 months before your plan ends. Don’t leave it to the last minute.
- Keep notes throughout the year. Jot down things like:
- “Used all my physio funding—need more.”
- “Didn’t use group activities—not for me; I prefer one-on-one.”
- “My mobility has declined—I need more support hours.”
- Gather evidence. If your needs have changed, get letters from your doctor, occupational therapist, or other health professionals to support your request for more funding.
- Think about your goals. What do you want to achieve in the next 12 months? Your goals shape your funding.
Pro Tip:
You can ask for a plan review earlier if your circumstances change significantly (for example, if you have a fall, a change in health, or your living situation changes).
Tip #10: Be Kind to Yourself
This is perhaps the most important tip of all.
Starting your NDIS journey can feel like learning to ride a bike. At first, it’s wobbly. You might feel unsure. You might make a few wrong turns. That is completely normal.
Remember:
- You don’t have to know everything today.
- It’s okay to make mistakes—you can learn from them.
- You are not alone. There are thousands of participants, families, and professionals who want to help.
- Your plan is designed to support you. You have the right to use it in a way that makes your life better.
Real-Life Example:
Tom felt overwhelmed for the first six months of his plan. He made a few mistakes—he hired a provider who wasn’t a good fit, and he didn’t track his spending carefully. Instead of giving up, he called his support coordinator, asked for help, and learned from what went wrong. By the end of his first year, Tom felt confident and in control. His second plan was even better because he knew what he needed.
Tom’s story is not unusual. Most participants grow in confidence over time. You will too.
Quick Reference: 10 Tips for New NDIS Participants
| Tip | Key Action |
|---|---|
| 1. Read your plan slowly | Take time to understand your funding and goals |
| 2. Understand the three funding buckets | Know the difference between ‘core’, ‘capacity building’, and ‘capital’. |
| 3. Choose your management type | Pick NDIA-Managed, Plan-Managed, or Self-Managed based on your needs |
| 4. Find a Support Coordinator | Use this funding if you have it—it is your guide |
| 5. Take your time choosing providers | Interview and trial providers before committing |
| 6. Always use a service agreement | Get everything in writing to avoid confusion |
| 7. Keep track of your spending | Check your balances monthly |
| 8. Ask questions | No question is too small—ask your LAC, Support Coordinator, or plan manager. |
| 9. Prepare for your plan review | Start preparing 3 months before your plan ends |
| 10. Be kind to yourself | Learning takes time—you are doing great |
What to Do in Your First Week
If you’re feeling overwhelmed about where to start, here’s a simple action plan for your first week:
Day 1: Read your plan. Highlight the funding amounts, categories, and end date.
Day 2: Decide on your management type or confirm what’s already in place.
Day 3: If you have Support Coordination funding, contact them to arrange a meeting.
Day 4: Start making a list of what supports you need most urgently.
Day 5: Research 2–3 providers for your most urgent support (e.g., personal care or transport).
Day 6: Contact those providers and ask for a chat or a trial shift.
Day 7: Take a break. You’ve done great work. Celebrate the first step.
Conclusion: Your Journey Is Just Beginning
Receiving your NDIS plan is not the end of a process—it’s the beginning of a new chapter. A chapter where you have funding, choice, and control over the support you receive.
Will it be smooth sailing every day? Probably not. But with these tips for new NDIS participants, you now have a map to help you navigate the early days. You know what questions to ask, who to turn to for help, and how to avoid the common pitfalls that catch many beginners off guard.
Remember:
- You are in control. Your plan is yours to use in a way that works for your life.
- Help is available. You don’t have to figure it out alone.
- Take it one step at a time. You don’t need to have everything sorted on day one.
You’ve taken the first step by reading this guide. That shows you are already on the right path.
Welcome to the NDIS community. We’re glad you’re here.
Learn More About NDIS
We hope this guide helped you feel more confident about starting your NDIS journey. The more you understand, the more you can make your plan work for you.
- Read our guide on how to apply for NDIS – if you’re still waiting for approval, this will help you prepare.
- Learn about NDIS eligibility requirements. Are you or a loved one unsure if you qualify? Start here.
- Read our guide on common mistakes in the NDIS – learn from others’ experiences and avoid the pitfalls.
Start understanding your options today. Your best support journey starts with knowledge.